Ichikraft Gardenia Ribbon Flower - Photographed by Acik Mardhiyanti / Acik Mdy
Hi all of you, how are you today? Today I want to share with you how we create a Gardenia ribbon flower. You will know and find out our work behind the screen. Our products aren't mass production. I create and design all of them by myself. Each design is special and unique. I create only one or 5 pieces of each design that I create. Sometimes there is any story behind it. For example, it is our Gardenia flower.
What our story about Gardenia Flower? When I was a kid there was a bunch of it. Most of the villagers planted it at their yards. It was a common plant. I remember how fragrant and beautiful this flower. My friend and I walked around the village and picked it. We were always excited when Gardenia flower bloomed. Unfortunately, a few years later this flower just like vanish. No one care or remember how beautiful this plant.
Now, I create and design a Gardenia ribbon flower to remember how beautiful this flower at the time. I want to share with you about its story and hope you enjoy my work. Let's rock!
- 6 cm of Double-faced / DF green satin ribbon 2 pieces
- 5 cm of Double-faced/ DF white satin ribbon 6 pieces
- 4 cm of double-faced/ DF white satin ribbon 5 pieces
- 4 cm of double-faced/ DF white satin ribbon 4 pieces
- tread
- needle
- flower stamens/ flower stem
- silver leaf
- 2,5 cm pin
- felt
- handmade label
The processing,
1. Step 1
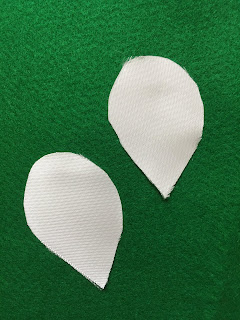
- Create and shape all of the white ribbons just like the picture below
The petals of Gardenia flower - Photographed by Acik Mardhiyanti / Acik Mdy
Photographed by Acik Mardhiyanti / Acik Mdy
Photographed by Acik Mardhiyanti / Acik Mdy
Photographed by Acik Mardhiyanti / Acik Mdy
Photographed by Acik Mardhiyanti / Acik Mdy
- Create the center of Gardenia flower
The center of gardenia flower - Photographed by Acik Mardhiyanti / Acik Mdy
- Join 4 petals by stitching them. You need 4 cm DF white satin ribbon 4 pieces
- Create and shape the green DF satin ribbon just like leaves
Cut and shape the green of satin ribbon - Photographed by Acik Mardhiyanti / Acik Mdy
Photographed by Acik Mardhiyanti / Acik Mdy
Photographed by Acik Mardhiyanti / Acik Mdy
2. Step 2
- Cut the felt, 2 cm diameter. You need two pieces
- Use one of the felt, and attach the pin by stitching it
- Glue the handmade label
- One other felt, then glue 3 pieces of 5 cm of DF white satin ribbons
- Glue 3 pieces of 5 cm of DF white satin ribbons
- Glue 4 pieces of 4 cm of DF white satin ribbons
- Attach the center of Gardenia flower (step 1) by gluing it
3. Step 3
- Attach the silver leaf first
- Then Silver flower stamens
- Attach 1 of green DF satin ribbon (6 cm)
- Attach some of the green flower stamens by gluing them
- Then glue the green DF satin ribbon (6 cm)
- Now join it with others felt that attached with pin by gluing them
- Now it's done!
Ichikraft YouTube channel, how to create Ichikraft Ribbon Gardenia Flower - Video creator, content creator, designer, and business owner: Acik Mardhiyanti / Acik Mdy - Video Editor: RDZ
Now you know how we create Gardenia flower. And this is one of our Gardenia flower designs. Visit Ichikraft Etsy shop to know more about our design and order! here our Etsy shop https://www.etsy.com/shop/ichikraft And visit Ichikraft Youtube channel. Don't forget to subscribe to our channel.
Ichikraft Gardenia Flower Hair Accessory - Photographed by Acik Mardhiyanti / Acik Mdy
Ichikraft Gardenia Flower Hair Accessory - Photographed by Acik Mardhiyanti / Acik Mdy
We are also dedicated to helping others that need help. Especially villager children and down syndrome kids. Read Ichikraft Give and Care blog here to know our action here https://ichikraft-give-care.blogspot.com/
Note:
- Written by Acik Mardhiyanti / Acik Mdy
- Photographed by Acik Mardhiyanti / Acik Mdy
- Video creator, designer, and business owner, Acik Mardhiyanti / Acik Mdy
- Video editor Rdz
- Do not copy this article without permissions
- Do not reuse these photographed anywhere else without permissions


No comments:
Post a Comment